I told you I would do these nails! ;) Picnic nails!

Showing posts with label nailblog. Show all posts
Showing posts with label nailblog. Show all posts

May 15, 2014
#52 May Nail Art Challenge: Aztec

For this nail art I used three nailpolishes and black acrylic paint. The polishes are named. 'Take it mint' 'Dirty Liana' and 'Holo in one' all by Catrice.
I also made a tutorial for this nail art, if you want to see how I did this, you can click right here and you'll go directly to the tutorial ;)
Oh, I'm so in love with this nail art especially the print on the middlefinger


xoxo
Dutchnailss

May Nail Art Challenge: Sunset

For this nail at I was inspired by a picture my brother has made. And this is the picture that inspired me:

When I saw the challenge I immediatley knew I wanted to recreate a picture of my brother. So this is what I made on my own nails:


I'm kinda sad that the roe almost dissapears in the light that reflects on my nails, and I just could not find a better pose to fix that :(
The polishes I used for this nail art are #809 from Hema and on top of that I sponged 'Bloody Mary to Go' 'Orange-Utan' and 'Birdy Reloaded' all by Catrice.
I always have a hard time cleaning up my cuticles when I use a red for sponging (as you can see my cuticles are still kinda red) I wanted to try out a different technique to clean my cuticles up, but I totally forgot about that plan when I was sponging the colours on! Silly me ;)
I hope you like this nail art, plenty more to come this month!
Have fun painting and creating
xoxo
Dutchnailss
May 12, 2014
#51 May Nail Art Challenge: Teal

A while back I bought a lot of polishes(Haul blogpost!) which included some nailpolishes from the Rimmel London Rita Ora collection. Which where perfect for this challenge!
The polishes I used are '873 Breakfast in bed' '863 Do not disturb' from Rimmel London and 'Supernova' by NYC
I have filmed a tutorial for this nail art, but I have a new laptop and now I have troubles installing my editing program.. So I will hopefully fix this soon!


Have fun painting and creating
xoxo
Dutchnailss
Apr 11, 2014
#46 Pink clingfilm nail art
With the colours of the limited editon 'Crème Fresh' from Catrice which I swatched this week, I also made a clingfilm nail art.
This was the second time I tried the clingfilm technique, the first time I absolutely loved the results so I wanted to try it again ;) And it won't be the last time I did this either ;) This look reminds me of spring, Fresh and new: All the trees get new green leaves, all kinds of flowers pop out of the ground and birds begin to sing their song again.
I made tons of pictures of this nail art, just because it was a nice day and I loved the result so much! So prepare because I have a lot of pictures to share! ;)
The polishes used for this nail art are all from the Crème Fresh limited edition from Catrice. 'Make fast at Tiffany's' 'Evergreen 60s' 'Another Pink Panther' and 'Light your fire'
If you want to see how I did this I uploaded a tutorial on this nail art today! You can click right here to go directly to the video.
And, if you feel inspired by this (or any other) nail art I did, and you want to share it with me, you can! You can tag me on Instagram using #lookdutchnailss (dubble s!) or post it on my Facebookpage!


Have fun painting and creating,
xoxo
Dutchnailss
Follow my blog with Bloglovin
This was the second time I tried the clingfilm technique, the first time I absolutely loved the results so I wanted to try it again ;) And it won't be the last time I did this either ;) This look reminds me of spring, Fresh and new: All the trees get new green leaves, all kinds of flowers pop out of the ground and birds begin to sing their song again.
I made tons of pictures of this nail art, just because it was a nice day and I loved the result so much! So prepare because I have a lot of pictures to share! ;)
The polishes used for this nail art are all from the Crème Fresh limited edition from Catrice. 'Make fast at Tiffany's' 'Evergreen 60s' 'Another Pink Panther' and 'Light your fire'
If you want to see how I did this I uploaded a tutorial on this nail art today! You can click right here to go directly to the video.
And, if you feel inspired by this (or any other) nail art I did, and you want to share it with me, you can! You can tag me on Instagram using #lookdutchnailss (dubble s!) or post it on my Facebookpage!
Have fun painting and creating,
xoxo
Dutchnailss
Follow my blog with Bloglovin
Mar 16, 2014
March Nail Art Challenge #2 Ombre
Second challenge in the March Nail Art Challenge; Ombre nails. For the ombre I used two polishes from Catrice Crushed Crystals. A dark pink called 'Shooting Star' and a light pink called 'Call me princess' And (I almost forgot!) a bright pink for the base also from Catrice called 'You better think pink'


I did add a topcoat, so the texture of the two Crushed Crystal polishes completely disappeared but still had that amazing glitter! And lastly I added some thinestones to complete the look!
I also made a tutorial for this look, you can click right here and you'll go straight to it! ;)
Next up: Candies!
Have fun painting and creating,
xoxo
Dutchnailss
March Nail Art Challenge #1 Dotticure.

First up: a dotticure. And I came up with a simple dark nail art:

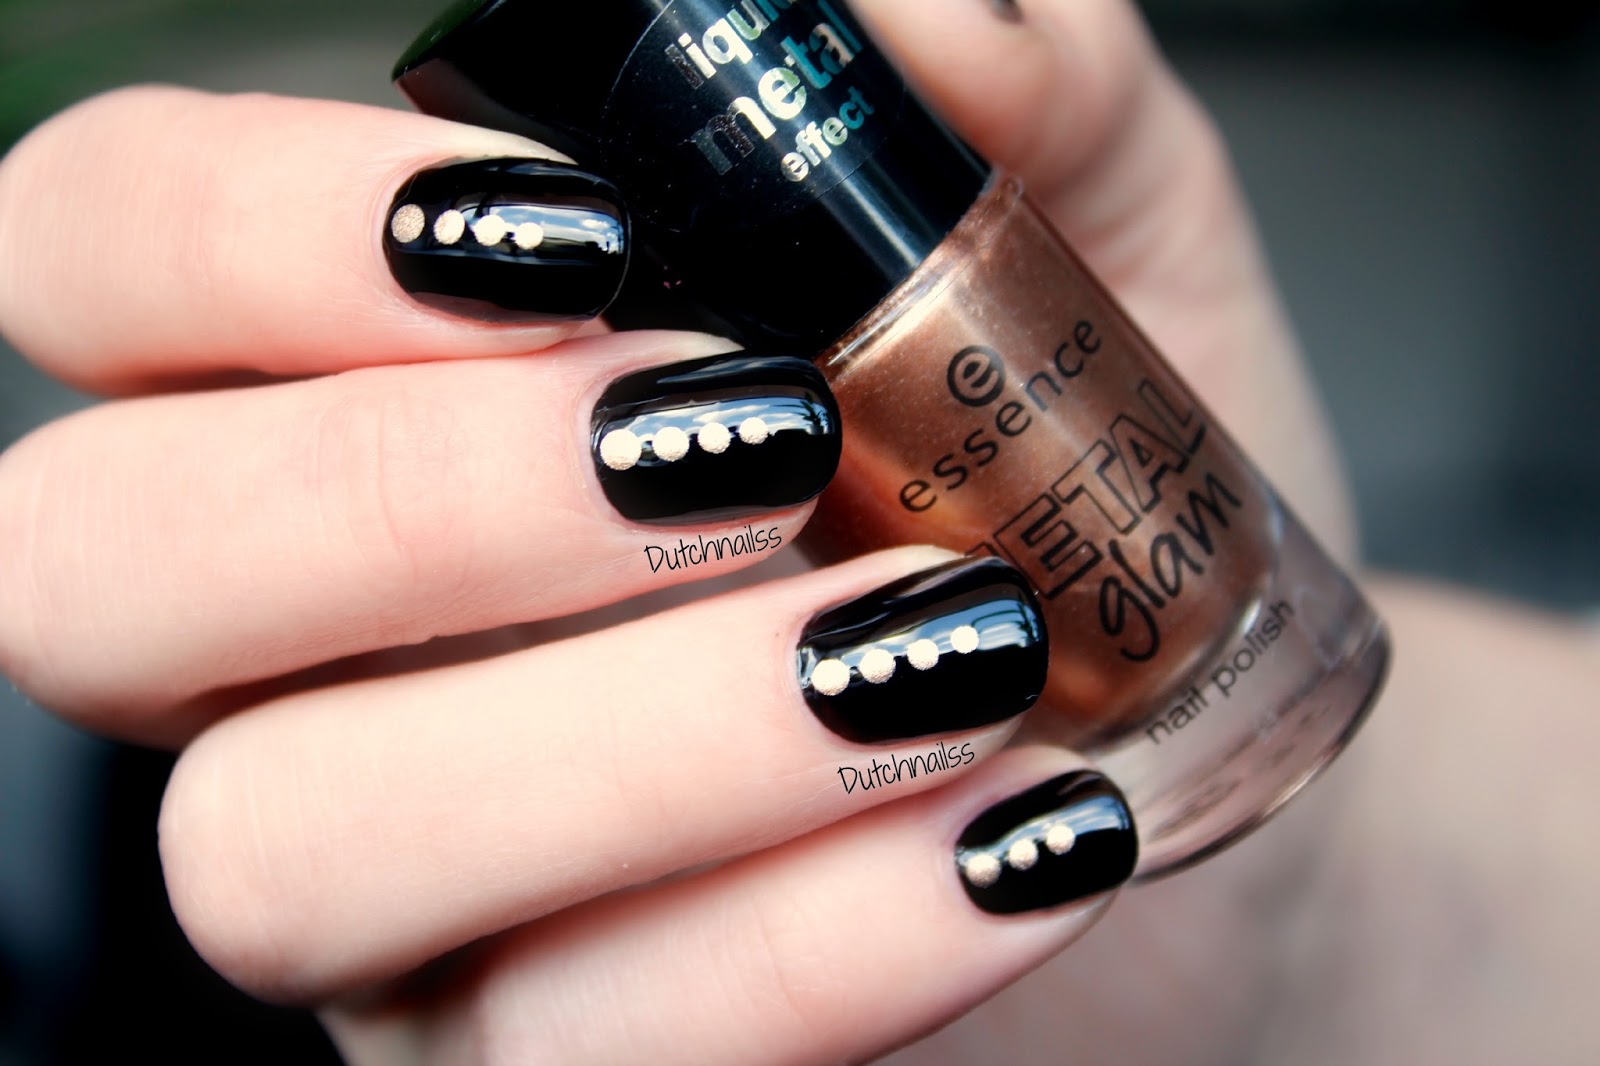

Just look at the shine! :D
The colours I used for this nail art are: Hema's #851 and Essence's 'Gold digger'
Next up: Ombre nails!
Have fun painting and creating,
xoxo
Dutchnailss
Feb 25, 2014
Pictorial on the 'Inspired by a picture'
Some of you asked me how I made this nail art! And since I never done a pictorial before I figured this was a good nail art to start with.
For this nail art you need a white polish, a matte top coat, black and white acrylic paint and a glossy topcoat. Also I used two different kind of stiping brushes, one longer and one medium size and a small nail art brush

Brushes I used:

Have fun painting and creating,
xoxo
Dutchnailss
Feb 21, 2014
#38 Thermal flower Nail Art
First of all, you might have noticed when you've watched the tutorial that I changed some things in the video. I'm trying out some things and I hope you don't hate it too much ;)
Today I made a random flower nail art with a thermal polish base. I liked the idea of the thermal polish changing the whole look of the mani with just having warm or cold hands.

This is how the mani looks like when cold..


Today I made a random flower nail art with a thermal polish base. I liked the idea of the thermal polish changing the whole look of the mani with just having warm or cold hands.
This is how the mani looks like when cold..
And a lovely pink when warm :)
And the transition between warm and cold. The mani look different every time! :D
For the flowers I used a white, yellow and blue acrylic paint. And for the base colour I used the Essence Superheroes 'Fantastic Girl' polish.
I made a tutorial for this manicure. If you want to see exactly how I did this you can click right here and you'll go to my youtube channel.
If you feel inspired by this look and recreate it, I would love to see what you did! If you have instagram, just use the hashtag #dutchnailss and I will see your design! :D
Have fun painting and creating,
xoxo
Dutchnailss
Feb 14, 2014
#37 Double Crackle Nail Art
Again a nail art inspired by someone else. This time I saw a tutorial on these nails on a youtube channel. The channel of ArcadiaNailArt. She makes amazing nail art and when I feel uninspired, her tutorials always give me the best ideas!
This was the first tutorial I saw on her channel, and I wanted to try it out because I was convinced my crackle polishes couldn´t do this.
But they could! :D

The idea of this nail art is that you use not only one crackle polish, but two. You start of with a normal colour polish. I used Catrice ´ASHley´. A light grey polish. And I used two crackle polishes of Essence. The polishes don´t have a special name, just black and white.
! This is very important if you want to try this out for yourself !
You need to apply a top coat polish in between the two crackle polishes, if you don't do that, the second crackle polish will just crackle the same way the first one did and you won't be able to see the first crackle polish.


The polishes I used for this look:

I made a tutorial for this manicure. If you want to see exactly how I did this you can click right here and you'll go to my youtube channel.
If you feel inspired by this look and recreate it, I would love to see what you did! If you have instagram, just use the hashtag #dutchnailss and I will see your design! :D
Have fun painting and creating,
xoxo
Dutchnailss
This was the first tutorial I saw on her channel, and I wanted to try it out because I was convinced my crackle polishes couldn´t do this.
But they could! :D
The idea of this nail art is that you use not only one crackle polish, but two. You start of with a normal colour polish. I used Catrice ´ASHley´. A light grey polish. And I used two crackle polishes of Essence. The polishes don´t have a special name, just black and white.
! This is very important if you want to try this out for yourself !
You need to apply a top coat polish in between the two crackle polishes, if you don't do that, the second crackle polish will just crackle the same way the first one did and you won't be able to see the first crackle polish.
The polishes I used for this look:
I made a tutorial for this manicure. If you want to see exactly how I did this you can click right here and you'll go to my youtube channel.
If you feel inspired by this look and recreate it, I would love to see what you did! If you have instagram, just use the hashtag #dutchnailss and I will see your design! :D
Have fun painting and creating,
xoxo
Dutchnailss
Feb 11, 2014
Inspired by a picture
Everyday when I wake up I always quickly check my Instagram. Just to see if anyone left a comment on a picture of mine and looking through the pictures people posted when I was sleeping. And just like today I was browesing through pictures of the people I follow. And I saw a picture. I immediately wanted to make this into a nail art manicure!
Some days passed and I finally had the time to make what I wanted. The picture that inspired me is from a lovely account named _JustMarina_ and it was this picture:

So I worked on this a for about a half day to make it the way I wanted it. But I'm SO HAPPY with the end result! I really really really like this nail art!
So prepare for a lot of pictures! are you ready?! ;) I made pictures with a matt finish and a glossy finish. Personally I like the glossy finish better on this nail art.


Some days passed and I finally had the time to make what I wanted. The picture that inspired me is from a lovely account named _JustMarina_ and it was this picture:
So I worked on this a for about a half day to make it the way I wanted it. But I'm SO HAPPY with the end result! I really really really like this nail art!
So prepare for a lot of pictures! are you ready?! ;) I made pictures with a matt finish and a glossy finish. Personally I like the glossy finish better on this nail art.
Maybe I'll make a tutorial on this nail art. But I'm not a 100% sure yet. Anyway if you like this design and try to recreate it and post it to Instagram tag #dutchnailss and I'll see it! :D
Have fun painting and creating,
Have fun painting and creating,
xoxo
Dutchnailss
Subscribe to:
Posts (Atom)