

Showing posts with label nailpolishes. Show all posts
Showing posts with label nailpolishes. Show all posts

Jan 3, 2014
Swatches: Essence Superheroes collection
The Essence Superheroes polishes originally consist of six different polishes: a thermo, a sand effect, a oil effect, a liquid gold and galaxy flakes. I only bought four of the six. I didn't like the galaxy flakes that much and the sand effect was already sold out I think because I didn't saw that one in the store.

In the store the 'Oil slick effect' and the 'Holo effect' were the ones that cought my eye. They both look goregous! But the 'liquid gold' has also a beautiful shine! And the 'Thermo effect' is the first thermo I own, I'm not really happy with the colors because purple makes my hands look very white and cold. And I never really liked the color pink. But the effect this polish gives is very nice.
 |
| Two coats of Super, man! |
 |
| Three thin coats of 'Wonder wow! Man!' |
 |
| Two thin coats of 'Power girl' |
 |
| Three coats of 'Fantastic girl' Puple when cold. |
 |
| Three coats of 'Fantastic girl' Pink when hot. |
Oct 30, 2013
#22 Smiley Faces
Sweet, happy and pink smiley faces!
I made these a while back, didn't liked the result and decided not to post them online. After a few times looking at the pictures of this mani I changed my mind. I'm still not really happy about the endresult, but hey I'm not perfect and my nails arent either ;)I'm from the Netherlands and when I started this blog I wrote all the blogs in dutch. At that time I made a smiley face how to, with step by step photo's. And now my blog is in english I wanted to add a video tutorial! Just because I find seeing someone actually painting her nails easier than copying a design from a photo.

The polishes I used are

If you feel inspired by this look and recreate it, I would love to see what you did! If you have instagram, just use the hashtag #dutchnailss and I will see your design! :D
I made a tutorial for this manicure. If you want to see exactly how I did this you can click right here and you'll go to my youtube channel.
Extra info
----------------------------------------------------------------------------------------------------------------------------
Youtube: http://www.youtube.com/user/Dutchnailss
Instagram: http://instagram.com/dutchnailss#
Weheartit: http://weheartit.com/Dutchnailss
Twitter: https://twitter.com/TheDutchnailss
Oct 11, 2013
#20 Spider nails ~ Nailart for halloween
Spooky, slimey and dark nails. It's time for Halloween nails!
It's October, the month were soo many things happen: World Animal Day, Breast Cancer Awareness month, Thanksgiving and soooo much more. And of course, the reason why I made this manicure: Halloween!I our family we don't do anything with Halloween, but I just liked to paint my nails in a Halloween theme ;)

I bought the orange color one day before I made this mani, I thought the orange color almost screamed HALLOWEEN! I don't know why, but I had to buy it and make a halloween mani with it ;)
The polishes I used for this manicure are

If you feel inspired by this look and recreate it, I would love to see what you did! If you have instagram, just use the hashtag #dutchnailss and I will see your design! :D
I made a tutorial for this manicure. If you want to see exactly how I did this you can click right here and you'll go to my youtube channel.
Extra info
----------------------------------------------------------------------------------------------------------------------------
Youtube: http://www.youtube.com/user/Dutchnailss
Instagram: http://instagram.com/dutchnailss#
Weheartit: http://weheartit.com/Dutchnailss
Twitter: https://twitter.com/TheDutchnailss
Aug 11, 2013
Black & White challenge! Part 5! #8
The next tutorial in the Black & White challenge series!
This time the challenge was to make a design with a black base and color ontop.
To watch the tutorial click right here to go to my Youtube channel
The polishes I used on this design are listed below

- base coat,
- NYC City Blackout
- a nameless lightblue polish
- two black teardrop shaped rhinestones
- top coat
Black & White challenge! Part 4! #7
It has been quite some time since I last postd a tutorial. I have been really busy and just didn't had the time to edit. I filmed it some days ago and now i finally got the time to edit the tutorial and upload it on Youtube!
Part four of the Black & White challenge: A white base with color. And this is what I made for this challenge
The products I used on this design

Sensationail kit!
I got this starterskit about one and a half weeks ago.
My parents bought me this as a late birthday present. And I am so happy with it! It is a easy way to quickly make some beautyfull nails that will last two weeks. (I wanted to test if that was really true, I kept on the polish for about one week and maybe two days and then I just wanted to paint my nails another way. But the polish still looked like I painted them the day before!)
As I have told before, my nails are extremely fragile and thin. This is why I wanted to try this kit out. With this gelpolish on my nails they feel a lot stronger.
This is how my nails looked when I just painted them!

The red color really pops! and the shine didn't dissapear when the polish dried. I really like the result. But the removing of the polish... It was a pain! You have to use pure acetone and let the acetone 'soak' your nails and after that you have to scrape off the polish with a special tool. My nails looked so bad after all the polish was removed :(
I do think I'll do this again even though I really hated to remove the polish. But that doesn't change the fact that I really like the shine and the durability of the gelpolish!
Black & White challenge! Part 3! #6
I MADE A MISTAKE! OH NOOO!
This nailart should be a black base with colors design (the third one on the challenge list) But for some reason my mind just decided that I should do a color base with black (which is the fifth challenge on the list) And I made this
But then I decided to just switch the two challenges. This way I can keep this nailart on my nails and I already had a hard time thinking about what I should make with a black base and color. So now if have some more time to think about that and in the mean time, I have this amazing tiger look on my nails!
So the list you saw on the first post when I started this challenge is slightly changed. The third challenge became the fifth and the fifth challenge became the third challenge, as easy as that!
Even though I wasn't supposed to do this nailart. I still like it a lot! I chose two intense colors for this look. Both are polishes from Catrice. These polishes were a limited edition and I just had to have them :)
If you want to see how I made this design click here!
The polishes I used to create this look are listed below

- A base coat,
- Catrice: I'm a survivor
- Catrice: Like a jungle drum
- NYC: City Blackout
- Top coat.
Aug 9, 2013
Black & White challenge part 2! #5
My second nail art design of the Black & White challenge!
This time I had to make a design with a black base and white decorations.
I had a really hard time to come up with a design, I just couldn't think of a design to make with a black base and white decorations. But I eventually came up with this design
I think this is a real classy and at the same time cute design. I used black and white (of course) because this was the point of the challenge. But I think this design will look good in colors too! Maybe just in blue colors, or in multiple colors! This design can be made in many ways! That's the way I like it ;)
If you would like to see how I made this design. Click here to watch it!
Aug 7, 2013
Garlic base coat?!
Yes, you did read that correct: Garlic base coat. I'm not sure if this is a already known fact or that I just got fooled or something.
About two weeks ago I saw this video of a Dutch beautyblogger; Beautygloss. In this video she told about how she uses garlic in her base coat. She said this helps strenghten your nails and this way they will grow longer!
My nails are really really really soft and they break so fast! So I thought: Why not give it a try!
After watching the video I immediately grabbed a unused topcoat and shoved a whole clove of garlic in the polish. Well... not in one piece of course ;)
What you need to do:
~Step 1 Choose or buy a top/base coat.
~Step 2 Find a clove of garlic and remove the outer layer and the two harder parts at the ends.
~Step 3 Cut the garlic into small pieces so that they just fit in the polish. But don't cut them too small. You don't want bits of garlic come out when you want to apply the base coat.
~Step 4 Leave this be for one week. You will have to shake the bottle every day.
After one week of waiting, your base coat is ready to be used!
I hear you thinking; 'But doesn't it smell like garlic?!?' Well.. yes it does, but not as strong as you might think. And eventually when the polish dries it will only smell a little
I only started using this as my base coat two weeks ago, I already feel the difference a little: my nails feel stronger and they still are growing strong! I hope it will continue to strenghten my nails!
This is what my polish looks like with the garlic in it

Aug 3, 2013
#3 Blocky Colors!
Here's another one! A new DIY

A colorful and fun design! It may look like it took ages! But it really is a quick and easy design to paint on your own nails!
If you click right here you will go to my Youtube channel to watch the howto!
The colors I used are listed below:
- Base coat
- Pastel yellow: Vanille love by Catrice
- Black polish
- Pink: Wheels on fire by Catrice
- Lighter pink: The Salmon Dance by Catrice
- Green: Green Days by Catrice
- Top coat
- Pastel yellow: Vanille love by Catrice
- Black polish
- Pink: Wheels on fire by Catrice
- Lighter pink: The Salmon Dance by Catrice
- Green: Green Days by Catrice
- Top coat

Jul 30, 2013
#2 Newspaper nails with cartoon flowers
My new howto: Newspaper nails with cartoon flowers!
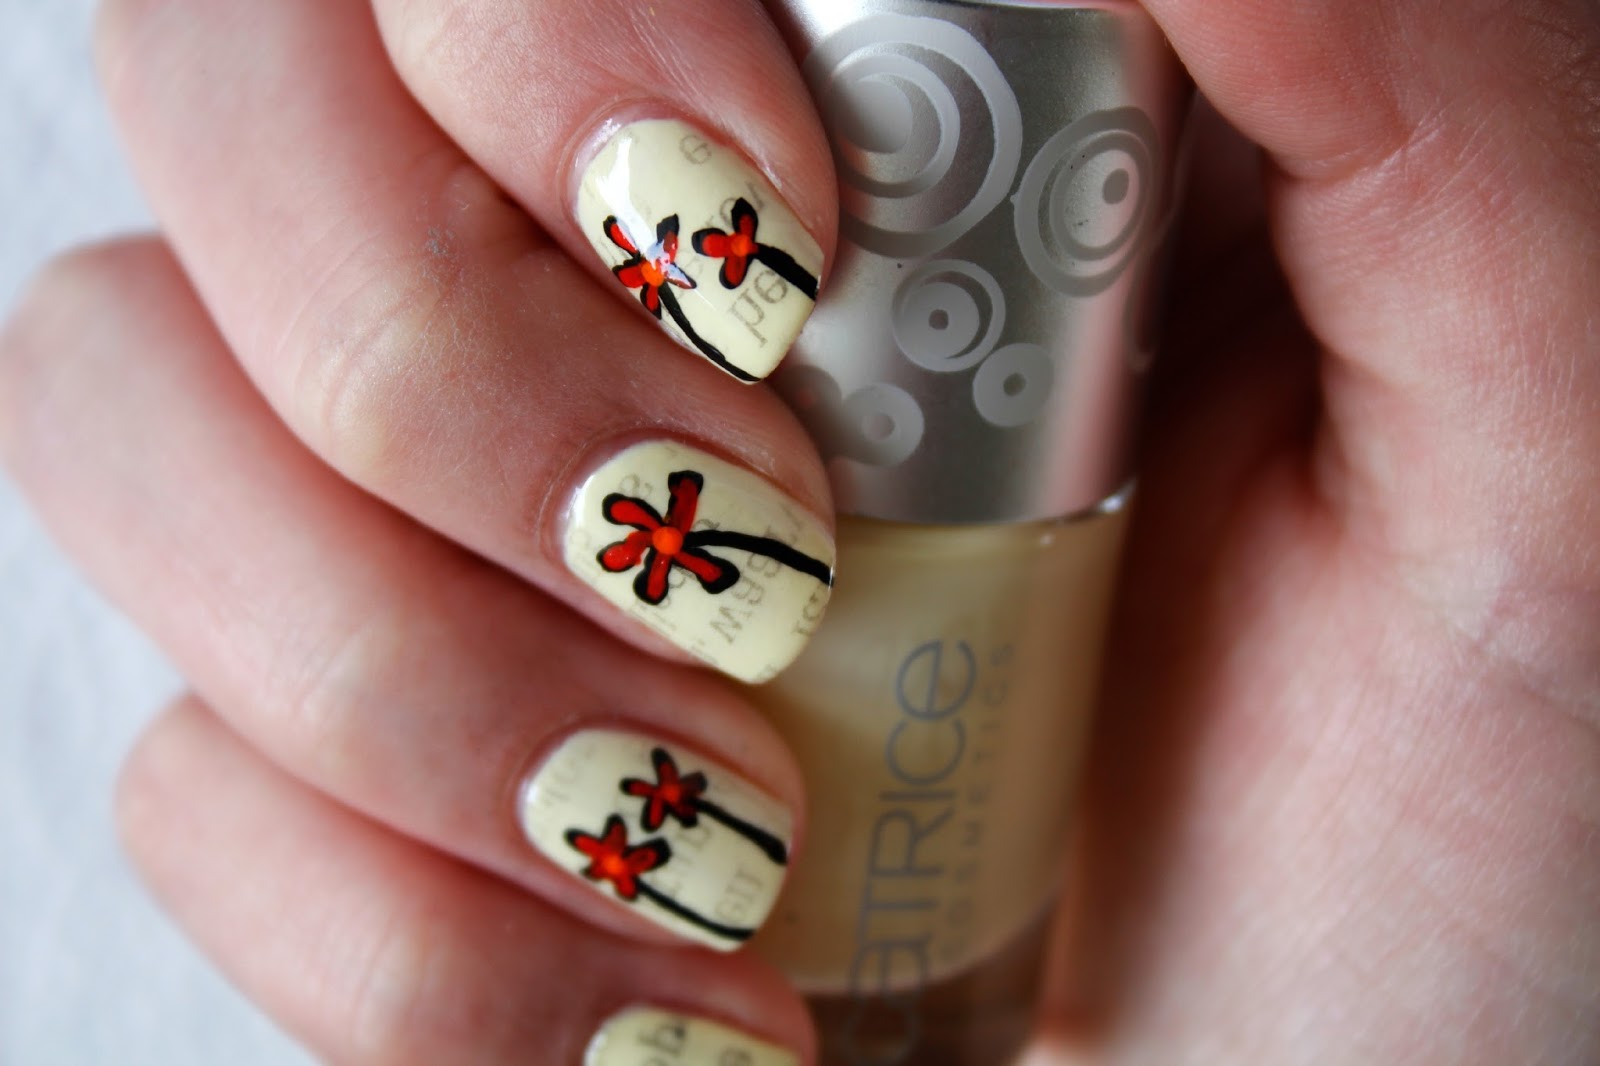
If you click right here you will go to my Youtube channel to wacht the tutorial!
The colors I used are listed below:
Nail polishes:
- Base coat
- A pastel Yellow: Vanille love by Catrice
- Top coat
Acrylic paint:
- Black, red and orange paint


Subscribe to:
Posts (Atom)